
Drip Edge Installation: A Guide for Roofing Crews
Improper drip edge installation continues to cause roof leaks and premature failures in the roofing industry. Many crews rush through this critical step, leading to water intrusion, fascia damage, and even warranty disputes that can cost contractors thousands in callbacks. When installed correctly, this simple metal flashing component provides essential protection by directing water away from fascia boards and into gutters.
As roofing systems become more complex and building codes more stringent, mastering the finer points of drip edge installation becomes increasingly important. This guide covers the essential best practices that will help your crews deliver superior installations, reduce callbacks, and increase customer satisfaction. Whether you're training new technicians or refining your company's installation protocols, these techniques will elevate your roofing quality.
Understanding Drip Edge Components
The right materials make all the difference in successful roof drip edge installation. Drip edges typically come in aluminum, galvanized steel, or copper, with aluminum being the most commonly used due to its balance of durability and cost-effectiveness.
Material Selection Considerations
When selecting materials for roof drip edge installation, keep these factors in mind:
- Climate conditions (coastal areas may require corrosion-resistant materials)
- Compatibility with other roof components
- Local building code requirements
- Aesthetic preferences of the homeowner
Proper Installation Sequence
Installing drip edge on roof systems follows a specific sequence that ensures proper water management. The order of operations is crucial for waterproofing integrity.
Eave Edge First, Rake Edge Second
- Install the drip edge along the eaves first
- Apply underlayment over the eave drip edge
- Install rake drip edge after the underlayment and shingles
- Ensure proper overlapping at all corners
This sequence creates a shingling effect that channels water down and away from the roof deck rather than underneath components. Proper rake drip edge installation is important for preventing wind-driven rain from getting under the roofing materials at the gable ends.
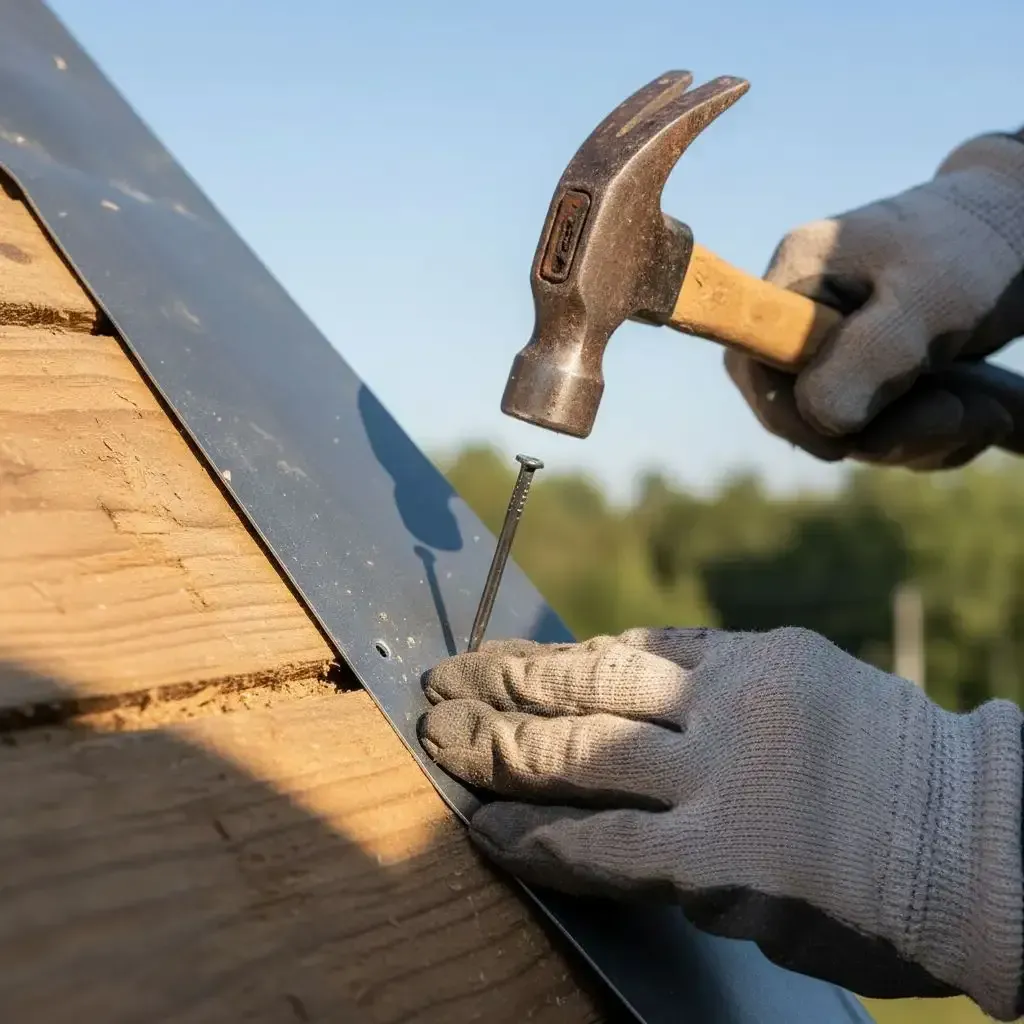
Fastening Techniques
Attaching the drip edge properly ensures it will remain secure through years of weather exposure. The standard approach calls for roofing nails placed 8-12 inches apart, but details matter.
Nailing Best Practices
- Use corrosion-resistant roofing nails
- Position nails in the upper portion of the drip edge flange
- Ensure nails penetrate solid wood decking by at least 3/4 inch
- Never nail through the roofing drip edge and shingles simultaneously
Professional roofers know that attaching the drip edge correctly is essential for long-term performance and preventing edge lifting during high winds or thermal expansion.
Size and Fitting Considerations
Understanding drip edge sizes helps ensure proper coverage and protection. Standard profiles include D-style, F-style, and T-style, each designed for specific applications.
Matching Profile to Application
Different roof edges require specific profiles:
- F-style: Commonly used at rakes
- D-style: Typically used at eaves
- T-style: Used for specialized applications
Proper sizing of drip edge sizes ensures adequate coverage and prevents water infiltration behind the fascia board.
Quality Control Checklist
Before considering a roofing drip edge installation complete, crews should verify:
- Proper overlap at all transitions (minimum 2 inches)
- Secure attachment with appropriate fastener spacing
- Correct positioning relative to asphalt shingles and underlayment
- Clean, straight edges with no distortion or damage
- Compatibility with gutter systems
Get Your Ticket for RoofCon Today
Mastering installing drip edge on roof systems is a fundamental skill differentiating quality-focused roofing contractors from the competition. These best practices ensure compliance with building codes and manufacturer warranties and deliver lasting protection for your customers' homes.
RoofCON is committed to advancing installation standards across the industry, helping contractors like you build better roofs. For more in-depth training on drip edge installation and other critical roofing techniques for various types of roof shingles and roof pitch for shingles, join us at our next professional development event.